
If you’ve ever walked through a house in the dead of winter and felt cold air seeping through electrical outlets, or noticed your energy bills climbing despite the thermostat staying the same, you already understand the problem this guide addresses. Spray foam insulation is one of the most effective ways to seal and insulate a building in a single step, but it’s also one of the most misunderstood. Homeowners, builders, and property managers often have questions about how it works, what type to choose, and whether it’s the right investment for their specific project.
This guide covers everything you need to know, from the chemistry behind the foam to the step-by-step installation process, safety requirements, and quality inspection methods. We’ve built this resource from years of hands-on experience in the field, and our spray foam insulation solution guide reflects what actually happens on real job sites, not just theory.
By the end, you’ll understand the difference between open-cell and closed-cell spray foam, what happens during a professional installation, how to evaluate the quality of a completed job, and which common mistakes to avoid. Let’s get into it.
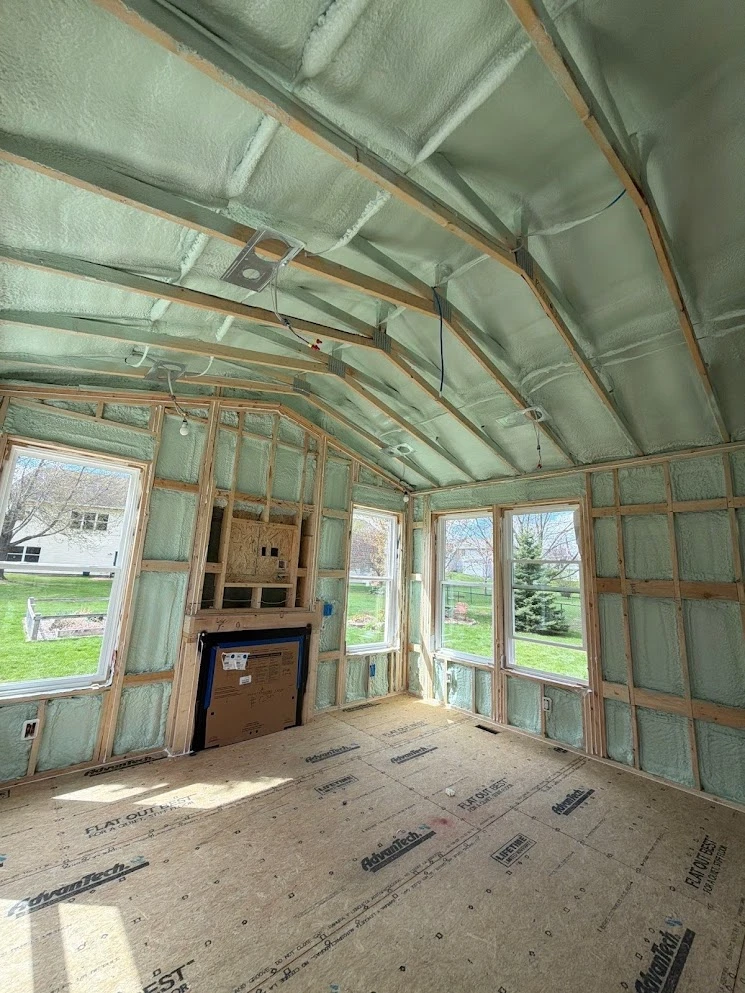
Spray polyurethane foam, commonly called SPF, is a spray-applied plastic that expands on contact to form a continuous insulation and air sealing barrier. According to the Spray Foam Coalition of the American Chemistry Council, SPF is created on-site by mixing and reacting two liquid components: the A-side (isocyanate, typically MDI) and the B-side (a polyol blend containing catalysts, blowing agents, flame retardants, and surfactants). When these two components combine, they react quickly, expanding to fill gaps, cracks, and seams while adhering directly to the substrate.
What makes spray foam different from traditional insulation materials like fiberglass batts or cellulose is its ability to insulate and air seal simultaneously. Fiberglass and mineral wool resist conductive heat flow, but they don’t stop air movement through gaps around pipes, wires, and framing. Spray foam does both. It expands into every cavity, no matter how irregular the shape, creating a custom-fit thermal barrier.
The U.S. spray foam insulation market reflects this growing recognition. According to Arizton market research, the U.S. market was valued at approximately $750 million in 2024 and is projected to reach $1.01 billion by 2030, growing at a compound annual growth rate of 5.09%. That growth is driven by rising energy costs, stricter building codes, and more homeowners discovering the comfort and savings that come with a properly sealed building envelope.
To understand why spray foam performs the way it does, it helps to know the basics of heat transfer. The U.S. Department of Energy explains that heat moves through buildings in three ways: conduction (through solid materials), convection (through air movement), and radiation (through electromagnetic waves). Most insulation materials slow conductive heat flow, measured by their R-value. Spray foam goes further by also blocking convective heat flow, because it creates an airtight seal that prevents air from moving through the building envelope.
The reaction between the A-side and B-side components releases heat and produces foam within minutes. The type of foam depends on the formulation. Low-density formulations create open-cell foam, while medium- and high-density formulations create closed-cell foam. Each has distinct physical properties that make it suited for different applications.
Once cured, spray foam is considered essentially inert and non-hazardous. The U.S. Environmental Protection Agency notes that the primary health concerns relate to the installation phase, when installers and bystanders may be exposed to isocyanates and other chemical vapors. After proper curing and ventilation, the foam itself poses minimal risk to building occupants.
This is one of the most important decisions in any spray foam project, and the right answer depends on your climate, your building, and your goals. Let’s break down the differences clearly.
Open-cell foam, also called low-density SPF, has a cell structure where the tiny bubbles are not completely closed. Air fills the open cells, giving the foam a softer, more flexible texture. It expands significantly, up to 100 times or more its original liquid volume, which makes it excellent at filling large cavities like wall stud bays and attic spaces.
Key characteristics:
Open-cell foam is commonly used in interior wall cavities, unvented attic assemblies, and above-grade applications where moisture permeability is actually desirable. In cold climates like ours here in Minnesota, it’s often the preferred choice for attic roof decks because it allows any moisture that enters the assembly to dry toward the interior.
Closed-cell foam, also called medium- or high-density SPF, has fully enclosed cell structures filled with a blowing agent gas rather than air. This gives it a higher R-value per inch and makes it a vapor retarder at thicknesses of about 1.5 inches or more.
Key characteristics:
Closed-cell foam is the go-to choice for below-grade applications like basement walls and crawl spaces, areas prone to moisture exposure, and any situation where you need maximum R-value in a limited depth. It’s also used for exterior applications and roofing systems.
| Property | Open-Cell Foam | Closed-Cell Foam |
|---|---|---|
| R-Value per Inch | 3.5 – 3.8 | 6.5 – 7.0 |
| Density | ~0.5 lb/ft³ | ~1.7-2.0 lb/ft³ |
| Vapor Permeability | Permeable (allows drying) | Vapor retarder at 1.5″+ |
| Moisture Resistance | Absorbs water | Repels water |
| Sound Absorption | Excellent | Good |
| Structural Benefit | Minimal | Adds rigidity |
| Expansion Rate | ~100-120x volume | ~30-35x volume |
| Common Applications | Walls, attics, sound control | Basements, crawl spaces, exterior walls, and roofing |
Expert Tip: Don’t default to closed-cell foam just because it has a higher R-value. In many attic applications in cold climates, open-cell foam is actually the better choice because it allows the assembly to dry inward. Using closed-cell foam on the underside of a roof deck without proper moisture analysis can trap moisture and create long-term problems. We always evaluate each building individually before recommending a foam type.
A professional spray foam installation follows a specific sequence of steps. Skipping any of them, or cutting corners, leads to poor performance, failed inspections, and sometimes health hazards. Here’s what a proper installation looks like from start to finish.
Before any foam is sprayed, the installation team evaluates the building and develops a plan. This includes:
For retrofit projects, this assessment phase is especially important. According to the Spray Foam Coalition, converting a conventional vented attic to an unvented attic assembly involves closing off existing ventilation, checking for open combustion appliances, extending sewer and exhaust fan vents, and removing existing insulation from the attic floor. Missing any of these steps can create serious problems.
This is where professional installations really separate themselves from DIY attempts. Proper site preparation includes:
HVAC System Shutdown: The building’s heating and cooling system must be turned off and sealed. This prevents dust, aerosols, and chemical vapors from being distributed through the ductwork. The Spray Foam Coalition recommends sealing air intakes with plastic sheeting and tape. Some manufacturers recommend keeping the HVAC system sealed for up to 24 hours after application.
Occupant Evacuation: All building occupants, pets, and non-SPF workers must leave the building during application and for the manufacturer’s recommended re-occupancy period afterward. For residential projects, this typically means the family needs to vacate for the day.
Protective Covering: Windows, doors, fixtures, and any surfaces not receiving foam are covered with plastic sheeting to protect against overspray.
Ventilation Setup: Portable ventilation equipment is set up to supply fresh air to the application area and exhaust vapors, aerosols, and odors outside. The exhaust must be positioned so that exhausted air doesn’t re-enter the building.
Fire Safety: All ignition sources (pilot lights, open flames, cutting torches) are extinguished. Fire extinguishers are placed in both the storage and installation areas.
Spray foam is manufactured on-site using specialized equipment. The setup process involves:
Expert Tip: That test spray at the beginning of the day isn’t optional. It’s your first quality control check. If the foam looks off, feels sticky, or isn’t expanding to the expected volume, you stop and troubleshoot before touching the building. Temperature, humidity, and material freshness all affect foam quality, and the test spray catches problems early.
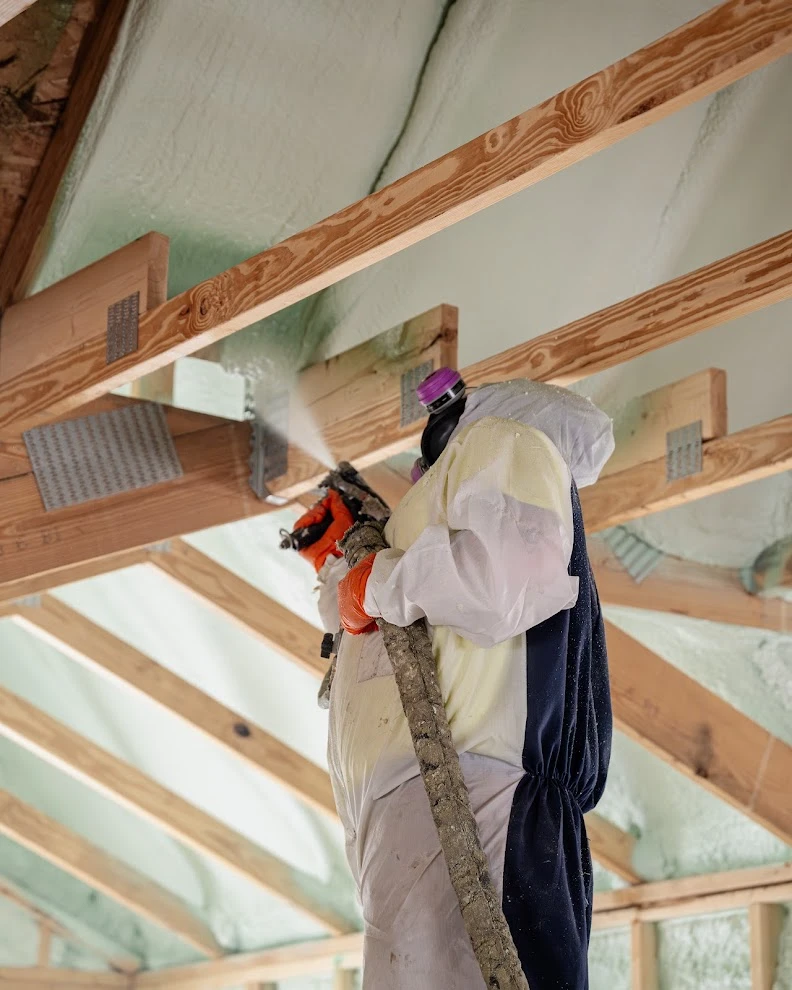
This is where technique and experience matter most. The application process follows specific methods:
Pass Technique: Foam is applied in controlled passes (also called lifts). The Spray Foam Coalition emphasizes that applying too much foam in a single pass without allowing it to cool between layers is one of the most dangerous mistakes an installer can make. The chemical reaction generates significant heat, and excessive thickness in one pass can cause spontaneous combustion, especially with closed-cell foam, which retains heat longer than open-cell.
Picture Framing: For closed-cell foam in wall cavities, many applicators use a technique where they spray the edges of the cavity first (creating a “cant”) and then fill the middle with an up-and-down or side-to-side motion. This ensures good adhesion to the framing members but can leave the center thinner, so installers must monitor and maintain minimum thickness throughout.
Thickness Monitoring: Throughout the application, installers use thin wire probes or depth gauges to measure foam thickness and ensure it meets the specified R-value requirements. This is checked at regular intervals.
Ambient Conditions: Temperature and humidity directly affect foam quality. If the substrate is too cold, the foam may not adhere properly. If it’s too hot or humid, the reaction may be affected. Installers monitor conditions throughout the day and adjust their approach accordingly.
After the foam cures, which typically takes a few minutes for initial curing and up to 24 hours for full curing, several finishing steps follow:
Trimming: Open-cell foam is often trimmed to create a flat surface for drywall or other finishes. Various tools and methods are used, and the installer follows the manufacturer’s recommendations. Closed-cell foam typically requires minimal trimming because it’s applied to a specific thickness.
Repairs: Any voids, thin spots, or areas discovered during trimming are repaired with additional foam or sealant.
Thermal Barrier Application: Building codes require that spray foam be separated from the building’s interior by an approved thermal barrier, typically 1/2-inch gypsum wallboard or an equivalent material. Some installations use approved intumescent coatings instead. This is a fire safety requirement and is not optional.
Cleanup: All protective coverings, trimmings, and waste materials are removed from the site. Waste foam is handled carefully. The Spray Foam Coalition specifically warns that large bales of waste insulation can generate enough internal heat to cause smoldering or fire, so they should be cut open, doused with water, and allowed to cool before disposal.
Key Takeaways: The Installation Process
Safety during spray foam installation is not an area where anyone should cut corners. The chemicals involved are hazardous during application, and proper protocols protect both the installation crew and the building’s future occupants.
The U.S. EPA identifies isocyanates as a leading chemical cause of work-related asthma. Exposure to isocyanates can cause skin, eye, and lung irritation, asthma, and sensitization, which means some people become allergic and can experience severe reactions from even low future exposures.
Because of these risks, professional installers wear a full complement of PPE:
Expert Tip: Homeowners sometimes ask if they can stay home during installation or help out. The answer is no. The re-occupancy period exists for a reason, and it’s based on the foam manufacturer’s specific recommendations. Ventilation must run for the full recommended period before anyone without PPE enters the space.
Proper ventilation during and after application serves two purposes: it protects the installers by reducing airborne chemical concentrations, and it accelerates the off-gassing and curing process so the building can be safely reoccupied sooner. The EPA has published specific ventilation guidance for SPF applications that outlines containment strategies and air exchange rates.
The ventilation setup typically creates negative pressure in the spray area, pulling fresh air in and exhausting contaminated air outside. Care is taken to ensure that the exhaust doesn’t introduce vapors into adjacent occupied spaces or back into the building through windows or intakes.
The chemical reaction that creates spray foam is exothermic, meaning it generates heat. When applied too thick in a single pass, the internal temperature of the foam can reach levels high enough to cause spontaneous combustion. This is particularly dangerous with closed-cell foam, which retains heat more effectively than open-cell.
The Spray Foam Coalition recommends using a stick-probe thermometer to check the internal temperature of freshly applied foam and waiting for adequate cooling before applying additional layers.
A spray foam installation isn’t complete until it’s been inspected and verified. Quality checks should happen both during and after the application.
A thorough visual inspection checks for:
Photographic documentation of the inspection is standard practice for professional installations.
Thickness measurements verify that the installed foam meets the specified R-value. Measurements are taken at regular intervals using calibrated probe gauges. Areas that fall below minimum thickness requirements are marked and corrected.
| Inspection Item | What to Check | Method |
|---|---|---|
| Coverage | No voids, gaps, or missed areas | Visual inspection |
| Adhesion | Foam bonded to substrate and framing | Visual and tactile check |
| Thickness | Meets specified minimum R-value | Probe gauge measurements |
| Surface Quality | Uniform color, no blisters or cracks | Visual inspection |
| Thermal Barrier | Approved material covering all foam | Visual inspection |
| Trimming | Flat surface for finish materials | Straightedge or level |
Beyond visual inspection, several performance tests can verify the quality of the building envelope:
Blower Door Testing: This test measures the air tightness of the entire building. A powerful fan mounted in an exterior door frame depressurizes the building, and the rate of air infiltration is measured. The 2012 International Residential Code (IRC) requires blower door testing for new residential construction. Performing this test before drywall installation allows any air leakage locations to be identified and addressed.
Carbon Monoxide Monitoring: Because spray foam significantly tightens the building envelope, carbon monoxide levels should be monitored when combustion appliances (furnaces, water heaters, fireplaces) are present. Tighter buildings change the dynamics of combustion air supply and ventilation.
Thermographic Imaging: Infrared cameras can detect areas of missing insulation or excessive air leakage by visualizing temperature differences across the building envelope. This works best when there’s a 20 to 30 degree Fahrenheit difference between indoor and outdoor temperatures.
Key Takeaways: Quality Verification
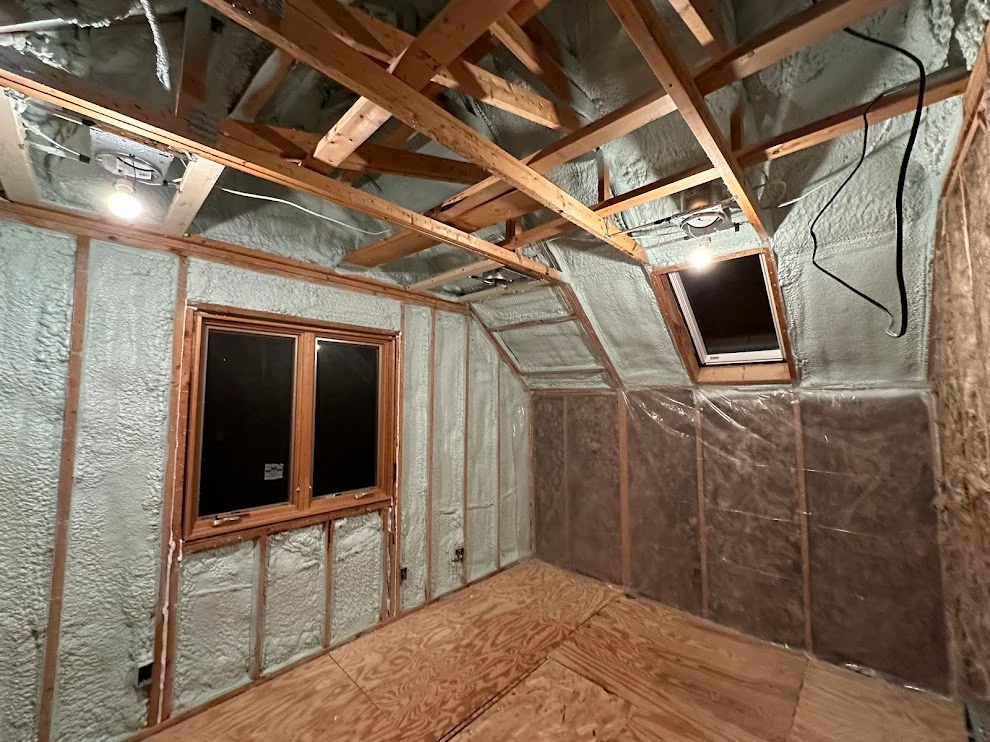
Different parts of a building have different requirements. Here’s how we approach the most common application areas.
Attics are one of the most impactful areas for spray foam because that’s where a significant portion of a building’s heat loss occurs. There are two approaches:
Vented Attic with Floor Insulation: Spray foam is applied to the attic floor (ceiling below) to insulate the living space while keeping the attic vented.
Unvented Attic Assembly: Spray foam is applied directly to the underside of the roof deck, bringing the attic inside the conditioned building envelope. This approach is increasingly popular because it eliminates extreme attic temperatures, protects HVAC equipment and ductwork, and creates usable conditioned storage space.
When converting a vented attic to an unvented assembly, existing insulation must be removed from the attic floor, ventilation openings must be sealed, and any open combustion appliances in the attic must be addressed. Exhaust fan ducts and sewer vents must be routed outside the building envelope.
Spray foam in wall cavities provides both insulation and air sealing. In new construction, foam is sprayed into open stud bays before drywall is installed. In retrofit applications, foam can be injected into existing wall cavities through small access holes.
Below-grade areas benefit most from closed-cell foam because of its moisture resistance and vapor barrier properties. These spaces often have higher humidity levels, and using a foam that acts as a vapor retarder helps prevent moisture-related problems like mold growth.
Expert Tip: In crawl spaces, pay close attention to the rim joist area where the floor framing meets the foundation wall. This is one of the most commonly overlooked sources of air infiltration, and it has a disproportionate impact on comfort and energy use. A properly sealed rim joist can make a noticeable difference in how a home feels and performs.
Spray foam is increasingly popular in pole barn and agricultural building applications. These buildings often have large, open interiors where the foam is applied directly to the interior of the metal or wood siding and roofing. Closed-cell foam is typically preferred for its moisture resistance and structural benefits.
After years of spray foam installations, these are the mistakes we see most often:
Applying Foam Over Wet or Dirty Substrates: Foam needs a clean, dry surface to adhere properly. Moisture interferes with the chemical reaction and can cause poor adhesion, leading to delamination later.
Ignoring Manufacturer Temperature Specifications: Both ambient temperature and substrate temperature affect foam quality. Applying foam outside the recommended range leads to poor expansion, weak adhesion, and reduced R-value.
Applying Too Thick in a Single Pass: As discussed earlier, this is a fire hazard and also produces lower-quality foam because the internal heat damages the cell structure.
Skipping the Thermal Barrier: Building codes require a thermal barrier between spray foam and the interior of the building. This is a fire safety requirement, and skipping it is both dangerous and illegal.
Not Addressing Existing Moisture Problems Before Installation: Spray foam tightens the building envelope, which can amplify pre-existing moisture issues. Mold, wet ducts, and water intrusion problems must be identified and fixed before foam is installed, or they’ll get worse.
Inadequate Ventilation During and After Application: This puts both installers and future occupants at risk and can lead to lingering odors and poor indoor air quality.
The financial case for spray foam insulation is backed by federal data. According to ENERGY STAR, the EPA estimates that homeowners can save an average of 15% on heating and cooling costs, or 11% on total energy costs, by air sealing their homes and adding insulation in attics, floors over crawl spaces, and basements. ENERGY STAR also notes that 9 out of 10 homes in the United States are under-insulated.
Spray foam delivers these savings more effectively than most other insulation materials because it addresses both heat transfer (through its R-value) and air leakage (through its air sealing properties) in a single application. Traditional insulation materials only address conduction.
The U.S. Department of Energy provides reference data showing that closed-cell polyurethane spray foam delivers an R-value of approximately 6.5 per inch, while open-cell foam delivers about 3.6 per inch at 3.5 inches of thickness. This means closed-cell foam can achieve the same R-value in roughly half the space required by many traditional materials.
Spray foam works in both new construction and existing buildings, but the considerations differ.
New Construction offers more flexibility. Framing is accessible, there are no existing finishes to work around, and the building can be designed with spray foam in mind from the start. The installation is typically faster and more straightforward.
Retrofit Applications require additional planning. Existing insulation may need to be removed. Access to cavities can be limited. Existing moisture problems must be identified and resolved before foam is applied. The building’s mechanical systems may need adjustment because the tighter envelope changes the heating and cooling loads. An HVAC system that was correctly sized for a leaky building may become oversized after insulation, leading to short cycling and reduced comfort.
The Spray Foam Coalition specifically notes that retrofitting an attic with spray foam can cause the HVAC system to become “oversized” relative to the new demand, especially in warmer climate zones where the HVAC also manages moisture levels. This is a situation where involving an HVAC professional is recommended.
The quality of a spray foam installation depends heavily on the skill and experience of the installer. Here’s what to look for:
Spray foam insulation is one of the most effective ways to improve a building’s energy efficiency, comfort, and durability. It insulates and air seals in one step, conforms to any cavity shape, and lasts the life of the building. But it only delivers these benefits when it’s installed correctly, with proper planning, safety protocols, and quality verification.
If you’re considering spray foam for your home or building, start by understanding what type of foam makes sense for your climate and application. Open-cell foam excels at sound control and large-cavity fill in above-grade applications. Closed-cell foam provides maximum R-value per inch and acts as a moisture barrier for below-grade and moisture-prone areas. In many projects, the best results come from using both types strategically in different parts of the building.
Choose your installer carefully. Ask about their training, their safety procedures, and their track record with projects similar to yours. Verify that they follow manufacturer guidelines, maintain proper ventilation, and conduct thorough post-installation inspections.
Use this guide as your reference as you move forward. Every section covers a specific aspect of the process, and each one matters. A quality spray foam installation is an investment that pays for itself through lower energy bills, improved comfort, and a building that performs better for decades to come.
Our team at Peak Spray Foam Insulation works with homeowners, builders, and property managers across Minnesota to plan and execute spray foam installations that perform. Whether you’re building new, retrofitting an existing structure, or just want an honest assessment of your insulation options, we’re here to help you make informed decisions. Reach out to us at [email protected] or call (612) 482-4742 to discuss your project. We’ll walk you through the process, answer your questions, and provide a straightforward evaluation of what your building needs.
When properly installed, spray foam insulation lasts the lifetime of the building. It doesn’t settle, compress, or degrade under normal conditions. Unlike fiberglass or cellulose, which can settle over time and lose effectiveness, spray foam maintains its R-value and air sealing performance indefinitely.
Most manufacturers recommend that homeowners vacate during the application and for a period of time afterward, typically up to 24 hours. The exact re-occupancy time depends on the specific product used, the size of the installation area, and the ventilation setup. Your contractor should provide clear guidance based on the manufacturer’s recommendations.
Yes, but substrate temperatures must be within the manufacturer’s specified range for proper adhesion and curing. Professional installers use heaters or other methods to warm the substrate when necessary. The foam generates its own heat during the reaction, but the initial application surface needs to be warm enough for the chemicals to react properly.
During the curing process, some off-gassing occurs. That’s why ventilation and re-occupancy protocols are so important. Once fully cured, spray foam is considered essentially inert. The U.S. EPA notes that the primary health concerns relate to the installation phase, not the cured product.
Once properly cured and ventilated, spray foam itself doesn’t produce airborne particles or allergens. In fact, by creating an airtight building envelope, spray foam can actually reduce the infiltration of pollen, dust, and other outdoor allergens. The ENERGY STAR program notes that air sealing and insulation can reduce the amount of pollen, dust, and insects entering a home.
Small-area projects can be handled with DIY spray foam kits, but whole-house or large-scale installations require professional equipment, training, and safety protocols. The chemical hazards, equipment requirements, and quality control demands of a full installation make professional installation the safe and practical choice for most projects.